
FloorPops Comet 12 in. x 12 in. Peel and Stick Virgin Vinyl Floor Tiles (10-Pack)
- FloorPops Comet Peel & Stick Floor Tiles
- Measures 60 inches x 24 inches x 0.06 inches when fully assembled
- Weighs 5.5 pounds
- Virgin vinyl material
Give Your Floors an Instant Makeover with DIY Peel and Stick Tile
If you’re looking for an easy and affordable way to transform the look of your floors without the hassle of traditional tile installation, peel and stick tile is a great option. Floorpops peel and stick tiles have exploded in popularity in recent years, allowing DIYers to upgrade their floors with minimal effort.
In this comprehensive buying guide, we’ll cover everything you need to know before taking the peel and stick tile plunge for your home, including what they are, how to install them properly, their cost, durability, styles, and more. Let’s get started!
What Are Floorpops Peel and Stick Tiles?
Floorpops peel and stick tiles are self-adhesive vinyl tiles that can be installed directly over most existing hard surfaces, including concrete, wood, and old tile. They come ready to apply right out of the box – no messy adhesives or grout needed!
Peel and stick tiles have an adhesive backing that is activated simply by removing the protective film. Once the backing is exposed, the tile can be pressed into place on the floor and adheres firmly, transforming the look of your floors in an instant.
The tiles can mimic popular flooring looks like wood, marble, travertine and concrete, but without the difficult installation and higher costs. And perhaps best of all, they can be easily removed or repositioned as needed without damaging the underlying floor.
How to Install Floorpops Peel and Stick Tile
Installing peel and stick vinyl tile is a snap, especially compared to traditional tile. Here are some simple steps for how to install Floorpops tiles:
- Clean the floor – Ensure the floor is clean and dry first. Sweep and mop thoroughly. For best adhesion, degrease and rough up the surface using an abrasive pad.
- Measure the space – Measure the room to determine the layout. Most peel and stick tiles are 12″ x 12″, so lay out the pattern on paper first. Mix and match patterns if desired.
- Cut tiles (if needed) – Use a utility knife to score and snap off any excess tile for edges and corners.
- Remove backing – One section at a time, peel off the backing adhesive film before placing the tile.
- Stick into place – Firmly press each tile into the floor, starting from the center and smoothing outwards. Use a roller over the tiles to secure the adhesive.
- Install trim – Finish with wall trim or transition strips on any exposed edges. Caulk if needed.
And that’s it – your new floors are ready to enjoy! Proper prep and care when installing helps ensure Floorpops tiles look great for years.
Are Floorpops Tiles Waterproof?
When choosing flooring for bathrooms, kitchens, and laundry rooms, waterproofing is a key factor. Floorpops vinyl peel and stick tiles are 100% waterproof, making them an excellent option for wet areas prone to spills.
The vinyl material and adhesive backing create an impermeable moisture barrier. Liquids remain on the surface, preventing water from seeping underneath and damaging the subfloor. This resistance to water makes Floorpops tiles highly durable in kitchens, bathrooms, basements and more.
Properly installed, Floorpops peel and stick tiles can withstand water splashes and constant humidity in bathrooms. The waterproof surface is also easy to clean. Just wipe up spills – no need to worry about warping or water damage damaging the adhesive.
Using Floorpops Tiles in Bathrooms
Thanks to their waterproof properties, Floorpops tiles are a great choice for bathroom floors. Their ability to resist moisture and mildew makes them ideal for high-traffic bathrooms. Plus, the easy peel and stick installation is perfect for over existing hard floors.
However, Floorpops states their tiles are not designed for use inside showers. The constant hot water and steam in a shower enclosure may compromise the adhesive over time.
For regular bathroom flooring that sees occasional splashes or bath water drips though, Floorpops tiles are an excellent option. Their low-maintenance and waterproof surface holds up well to humidity and liquids. Proper prep and installation will ensure the tiles stick tight.
With many stylish patterns to choose from, Floorpops makes it easy to get a beautiful, waterproof bathroom floor – minus the hassle of grouting and long dry times of regular tile.
How Durable Are Floorpops Peel and Stick Tiles?
Considering they install without professional help, many DIYers wonder: how tough are Floorpops vinyl tiles?
The good news is that Floorpops tiles are highly durable and made to last. Properly installed, they can handle normal foot traffic and daily wear and tear. Here are some factors regarding the durability of peel and stick vinyl tiles:
- Thickness – Floorpops tiles are a respectable 0.1″ (2.5mm) thick. This is thicker than economy peel and stick and allows it to better resist indentation.
- Vinyl composition – The vinyl material itself is naturally resilient, flexing slightly rather than cracking under pressure. The topcoat provides stain and scratch resistance.
- Adhesive strength – The proprietary adhesive backing forms a tenacious bond when applied properly to recommended surfaces. It is not prone to loosening over time.
- Wear layer – Floorpops tiles have a 0.5mm wear layer, providing extra durability on the walking surface.
Tested to stand up to furniture legs, pets, and everyday wear, Floorpops tiles have better durability than cheaper peel and stick when installed correctly on flat and structurally sound subfloors. Their flexibility and adhesive strength ensure a long-lasting flooring solution.
Cleaning and Care for Floorpops Tiles
Caring for Floorpops peel and stick tiles is simple, thanks to the durable and waterproof vinyl construction. Here are some tips for keeping them looking fresh:
- For everyday cleaning, simply sweep and mop with warm water or mild soap and water. Avoid harsh cleaners.
- Blot spills quickly to prevent staining. Spot clean with mild vinyl floor cleaner.
- For tougher spots or dirt buildup, use a soft brush or plastic scouring pad and mildly abrasive vinyl floor cleaner.
- Steam mops are safe to use on Floorpops tiles, but be sure to use the lowest steam setting and avoid prolonged direct steam.
- Periodically run a fan over the tiles to ensure moisture is not trapped beneath furniture or rugs.
With proper care, Floorpops vinyl tiles can retain their like-new appearance for years before needing replacement. Their waterproof surface resists moisture damage and is easy to clean. Follow the manufacturer’s maintenance recommendations to keep your peel and stick floors looking great.
Can I Install Floorpops Tiles Over Existing Floors?
One of the best perks of peel and stick tile is its versatility – in many cases, Floorpops tiles can be installed directly over existing hard flooring surfaces. This saves the time and mess of ripping up your old floors.
Here are the types of existing flooring compatible with Floorpops vinyl tiles:
- Sheet vinyl
- VCT (vinyl composite tile)
- Laminates
- Hardwood
- Cork
- Tile
- Concrete
- Stone
The key requirements are that the floor be structurally sound, flat, dry, smooth, and free of wax, oil or other coatings. Uneven areas greater than 1/4″ in height will need to be leveled first.
For best results, scuff sanding glossy or sealed floors allows maximum adhesive grip. Install Floorpops tiles parallel to existing grout lines when covering old tile.
Going over existing floors cuts installation time significantly. Just ensure proper prep and adhesive usage so the peel and stick tiles bond tightly. This allows enjoying your new floors without the dust and demolition of removing old flooring!
Are Floorpops Tiles Easy to Remove?
One advantage of peel and stick tile is that it can be removed fairly easily if needed, unlike grouted tile. Floorpops vinyl tiles can be taken up without damaging the underlying floor.
To remove Floorpops tiles:
- Carefully lift up a corner and peel the tile away slowly. Go slow to prevent the adhesive from ripping up any finish on the floor underneath.
- For stubborn tiles, heat with a blow dryer or use dental floss to slice through the adhesive layer while lifting gradually.
- Any adhesive residue can be scrubbed away with soapy water or lighter fluid. Rinse thoroughly.
- Patch or reapply floor finish if needed where tiles are removed.
While Floorpops are not designed to be repositioned multiple times, their removable design still allows for replacement, renovation or a change of décor down the road. Proper removal prevents adhesive from sticking to the subfloor.
So don’t worry about making a lifelong commitment! Floorpops offer temporary flooring freedom other types of tile can’t match.
Styles and Patterns Available
Beyond affordability and simplicity, one of the most appealing perks of Floorpops peel and stick tiles is the multitude of stylish patterns and color variations available.
Floorpops offers a wide array of designs – from natural stone and wood looks to geometric and decorative motifs. Here are some of the many styles you can choose from:
Wood look: Oak, weathered barnwood, whitewashed pine, exotic woods
Stone look: Travertine, marble, slate, concrete
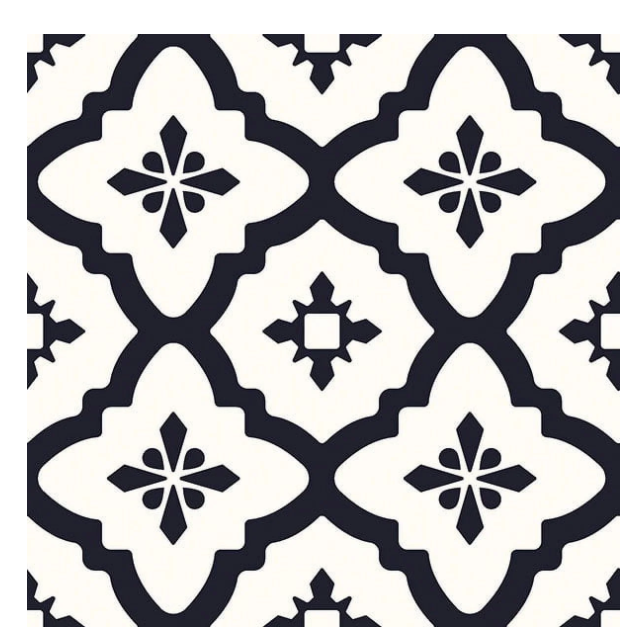
Decorative: Moroccan, encaustic cement, retro checkerboard, stenciled patterns
Metallic: Rose gold, copper, silver
Bold solid colors: Black, navy, teal, red, yellow
Mixing different tile patterns and colors together is also an easy way to create custom floors with distinctive style. The possibilities are nearly endless!
Floorpops tiles allow you to quickly change the vibe of a room, whether you like the charm of wood planks, cool stone effects, or modern metallic shine.
Cost and Budgeting for Floorpops Tiles
One of the biggest appeals of peel and stick tile is its affordability compared to traditional tile installation. On average, Floorpops tiles range from $2-$8 per square foot. This cost can vary based on the style.
Here is a closer breakdown of what to budget for your Floorpops tile project:
- Tiles: $2-8 per square foot for the tiles themselves. More premium wood and stone looks are higher.
- Quantity needed: Measure rooms to determine total square footage. Buy 10-15% extra.
- Additional materials: $50-100 for additional supplies – transition strips, adhesive, tools.
- Labor: Free! The DIY peel and stick format requires no professional installation fees.
- Total cost: To tile a 10′ x 10′ room would be about $200-500+ for materials, depending on tile style.
Compared to the average cost of $10-20 per square foot for installed ceramic or porcelain tile, Floorpops provides dramatic savings, letting you achieve new floors on nearly any budget.
Where to Buy Floorpops Peel and Stick Tiles
Floorpops vinyl peel and stick tiles are sold exclusively online direct through the manufacturer’s website at Floorpops.com.
Buying directly from the Floorpops website provides some advantages:
- All available styles and patterns in one place
- Order samples to view tiles in person
- Frequent sales and promos
- Rewards program for future discounts
- Excellent customer service team
Floorpops offers free shipping within the contiguous U.S. on all orders over $250. Lead time is typically 5-7 business days from order to delivery.
Alternatively, Floorpops tiles can sometimes be found through third party online retailers like Amazon, Walmart, and eBay. However, product availability, pricing, and quality is not guaranteed on third party sites. For best selection and service, purchase directly from Floorpops.com.
Tools and Prep Needed for Installation
Installing peel and stick vinyl tiles is considered an easy DIY project. That said, having the right tools and prep work is key for a successful application.
Here are the basic tools and materials needed:
- Tape measure
- Pencil
- Utility knife
- Straight edge/ruler
- Jab saw for cutting (if needed)
- Rubbing alcohol
- Rags
- Roller
- Premium adhesive (if needed)
Prep work is also essential:
- Clean floors thoroughly
- Fill any cracks or holes
- Level any uneven areas
- Scuff sand glossy floors for grip
- Plan layout and do a dry run
With the right prep and tools on hand, you can tackle the Floorpops installation process confidently.
How Floorpops Tiles Compare to Traditional Tile
For many homeowners, the choice often comes down to peel and stick vinyl tile versus traditional ceramic or porcelain tile. Floorpops tiles have distinct advantages when compared to regular tile:
- Ease of installation – No need to lay tile setting mortar or apply messy grout. Floorpops tiles stick right on.
- Cost – At just $2-8 per square foot installed, Floorpops is significantly cheaper than pro tile installation.
- DIY application – No need to hire a tile setter, reducing labor costs.
- Removability – Floorpops tiles can be removed without damaging the floor underneath.
- Waterproof – Floorpops vinyl resists moisture damage better than grouted tile.
- Quick installation – Apply floors in just hours or days rather than weeks.
- Style versatility – Tons of colors and patterns available. Mix and match with ease.
The convenience of peel and stick installation combined with affordable pricing makes Floorpops a winner for DIYers. And the stylish designs rival the beauty of higher-end tile for a fraction of the price.
Using Floorpops Tiles on Walls
If you love the look of Floorpops peel and stick tiles, you can also apply them vertically to walls as easy DIY backsplashes or wall accents.
For wall use:
- Ensure the surface is smooth. Sand and fill any imperfections for the tiles to adhere properly.
- Thoroughly clean walls and degloss painted walls for grip.
- Use a level and chalk line to keep tiles even and straight.
- Use a roller on the tiles, pressing firmly to secure the adhesive backing to the wall.
- If desired, apply a thin bead of silicone caulk between the edges of the tiles for added moisture resistance and a grout-like appearance.
With the proper prep and installation method, Floorpops tiles can create stunning backsplash designs, wainscoting accents, or all-over walls with texture and interest. Enjoy the same waterproof durability and stylish looks on walls or floors throughout your space.
Are Floorpops Safe for Kids and Pets?
For families with children or furry friends, safety is top priority when choosing flooring. The good news is Floorpops peel and stick tiles are certified pet- and kid-friendly.
Here are some of the key safety benefits:
- Made from phthalate-free vinyl
- Low VOC adhesive
- Slip resistant texture
- Waterproof surface
- Resists stains from spills or accidents
- Easy to clean
- Contains no harsh chemicals
Properly installed, Floorpops tiles are stable underfoot and will not come loose easily. The textured surface provides grip for kids’ feet and pet paws. And unlike carpet, the waterproof vinyl repels liquids if accidents occur.
Floorpops tiles also emit minimal VOCs during installation. Plus, the vinyl and adhesive are free from phthalates, formaldehyde, and heavy metals.
For pet owners, Floorpops won’t easily trap odors, hair, or dander like carpet. Feel good knowing your floors are kid- and pet-friendly!
Cutting Floorpops Tiles
One of the beauties of peel and stick tile is you don’t have to worry about tricky tile cuts. That said, some minor trimming or customization may be needed to fit Floorpops tiles into corners, around odd spaces, etc.
Luckily, cutting Floorpops tiles is easy with just a utility knife and straight edge. Here are some tips:
- Use a sharp utility knife and metal straight edge as guides to score through the vinyl.
- Place the straight edge where you want to cut. Press down firmly as you run the blade multiple times along the line.
- Snap the tile along the score. Straight cuts are cleanest.
- For curves, use scissors to carefully cut out sections after scoring the vinyl.
- Use a jigsaw for notching or holes if needed.
- File down any rough edges with an emery board.
With a steady hand and some practice, cutting Floorpops tiles is a cinch. Be sure to keep a few extra tiles handy for any mistakes. The simple score-and-snap method creates custom fits.
How Long Do Floorpops Tiles Last?
Investing in new floors means you want them to last. So what’s the lifespan of peel and stick vinyl tile?
With proper installation and care, the expected lifespan of Floorpops tiles is 7-10 years.
However, many factors affect longevity:
- Heavy traffic areas may show wear sooner.
- Exposure to excessive moisture reduces life expectancy.
- Quality of floor prep and application impacts adhesive strength over time.
- Level of maintenance also determines how long floors look new.
Compared to other DIY-friendly flooring like floating laminate, Floorpops vinyl has a comparable average lifespan before requiring replacement. Proper prep and care extends the life significantly.
And since they are easy to install, replacing worn sections or updating designs down the road is simple. Overall, Floorpops deliver durable and affordable flooring.
Floorpops Tiles and Heavy Furniture
Some homeowners worry whether peel and stick flooring can tolerate weighty furniture like couches, appliances, or kitchen islands. The good news is that Floorpops tiles can handle heavy objects, within reason.
Here are some tips for heavy furniture placement:
- Ensure the subfloor is level and structurally sound first – this supports the weight.
- Rotate furniture periodically to distribute weight evenly and prevent indentations.
- Use furniture cups and pads underneath legs for proper weight distribution.
- Avoid dragging heavy objects across the tile to prevent scuffing or peeling.
- For very heavy objects, use a furniture dolly and avoid impacting just a corner or edges.
Thanks to the durable vinyl material, Floorpops tiles are surprisingly strong. With proper precautions, they can withstand force better than real wood, stone or grouted tile which can crack under pressure.
Just take care when moving furniture into place and use proper floor protection. This allows enjoying stylish Floorpops floors that happily coexist with heavy items.
Alternatives to Floorpops Peel and Stick Tiles
Floorpops is one of the most popular and reputable brands of peel and stick tile on the market. However, there are other product alternatives that offer similar ease of installation and affordable pricing.
Some alternatives to explore include:
- Nupearl: Virtually identical to Floorpops with similar styles and sizes. Slightly more budget-friendly.
- TrafficMaster: Carried at Home Depot, with classic styles like checkerboard and stone.
- StikTiles: Vinyl plank peel and stick tiles with wood and stone looks.
- SmartcorePro: Available at Lowes, comes in wood, marble, and brick designs.
- Patchology: Peel and stick tiles sold at Wayfair, wide range of trendy geometric and nature-inspired patterns.
While Floorpops remains a frontrunner in terms of selection, quality, and brand reputation, several budget-friendly alternatives exist. Be sure to comparison shop and read reviews before purchase. And always properly prep floors for any peel and stick tiles you choose.
Troubleshooting Poorly Sticking Tiles
Once in awhile, you may encounter a Floorpops tile that just doesn’t want to stay adhered. If a tile corner lifts up or a tile seems to stick poorly, there are ways to troubleshoot and repair it.
Here are some tips for fixing stubborn tiles:
- Verify the floor is thoroughly cleaned and degreased first. Lingering contamination prevents adhesive grip.
- Check for uneven spots under the tile. Level any dips or bumps exceeding 1/4″.
- Remove and reapply using heavy roller pressure to ensure full contact between backing and floor.
- Try an additional layer of premium adhesive like Henry 417 to reinforce.
- As a last resort, remove, scrape away remaining adhesive and replace tile. Prime floor first before reapplying.
With proper floor prep and application technique, Floorpops tiles achieve a tenacious bond. But the occasional problem tile can be remedied with some gentle prying, adhesive reinforcement, and re-rolling the area firmly.
Achieve Gorgeous Floors on a Budget with Floorpops
Looking for floors as unique as your home? Seeking sophisticated style at DIY prices? Floorpops peel and stick vinyl tile empowers you to upgrade your floors with just a few tools, a bit of time, and minimal hassle.
Thanks to their incredible range of colors, patterns, and materials that mimic pricier options like wood and stone, yet cost a fraction of the price, Floorpops makes achieving your dream floors easy and affordable.
Follow this comprehensive buying guide to learn everything about product selection, proper installation, care and maintenance to ensure your Floorpops tiles look fresh for years to come. Their innovative peel and stick adhesive backing lets you tackle even large rooms and lasting floors – all with the satisfaction of DIY.
Your home’s possibilities are endless with the design flexibility of Floorpops. So peel, stick, and let your flooring vision come to life!