


Everything You Need to Know About These Trendy Removable Floor Tiles
Floorpops vinyl tiles are a popular option for upgrading floors affordably and with minimal commitment. These vinyl tiles have peel-and-stick backing that allows you to install them directly over existing floors. When it’s time for a change, they can be easily removed without damaging the underlying floor.
Floorpops tiles come in a wide range of colors, patterns, and designs to suit any style. From bold geometric prints to classic wood looks, marble, and stone styles, there’s an option for every room. Keep reading to learn all about Floorpops vinyl tiles and how to choose and install them in your home.
What Are Floorpops Vinyl Tiles?
Floorpops vinyl tiles are thin, flexible peel-and-stick tiles made from vinyl. They have an adhesive backing that lets you apply them directly to existing flooring surfaces, such as hardwood, tile, concrete, and vinyl plank floors. The top layer is a durable vinyl material available in many different looks, like wood, marble, stone, and abstract patterns.
Floorpops tiles are designed to be temporary and removable. When installed properly on smooth, clean floors, they can be peeled up without damaging the underlying floor. This makes Floorpops an affordable and commitment-free way to change up the look of a floor.
Peel-and-stick vinyl tiles like Floorpops are sometimes called self-adhesive tile or stick-down tile. They provide many benefits compared to traditional tile:
- Removable and reusable – Floorpops tiles can be removed cleanly and reused in another area. Traditional tile is permanent.
- Affordable – Vinyl tile costs a fraction of natural stone, ceramic, or porcelain tile. Prices typically range from $1-5 per square foot.
- Easy installation – No special skills or tools needed for application. Traditional tile requires more extensive prep and installation.
- Thinner profile – Floorpops tiles are 2-3mm thick. Stone or ceramic tile is at least 4 times thicker.
- Variety of looks – Vinyl tiles come in countless patterns and colors beyond what’s available with stone or ceramic tile.
How to Install Floorpops Vinyl Tiles
Installing Floorpops vinyl tiles is straightforward enough for DIYers. However, careful prep and following the instructions are important for proper adhesion. Here is an overview of the vinyl tile installation process:
Gather Supplies
- Floorpops tiles
- Tape measure
- Utility knife
- Pencil
- Straight edge/ruler
- Rubbing alcohol
- Rag
- Roller
- Patching compound or floor leveler (if needed)
Prepare the Floor
Proper prep is crucial for the Floorpops tiles to adhere well. The floor must be:
- Clean – Use rubbing alcohol and a rag to remove dirt, grease, wax, and any other residues. Vacuum thoroughly.
- Dry – Do not install Floorpops over damp floors. Check for moisture problems.
- Smooth – Use patching compound or floor leveler to fill dents, grout lines, and uneven areas for a flush surface.
Tip: For concrete floors, test alkalinity and use an etching solution if pH is over 9.0. Rinse well and allow floor to fully dry before vinyl tile installation.
Measure and Layout
Measure the floor space carefully to determine the layout. Mark reference lines in pencil. Allow 1/8 inch gap between the Floorpops tiles and walls or fixed objects. Cut border and irregular edge tiles to fit later.
Peel and Place
Begin installation in a corner. Peel away a portion of the backing and place the first tile. Continue laying whole tiles, peeling backing gradually as you go. Press down firmly as you lay each tile to activate the adhesive. Use a roller over the tiles to ensure strong adhesion.
Cut Border Tiles
At edges and around fixed objects, measure and mark tiles to be cut. Use a utility knife and straight edge to score and snap tiles. Place cut border and edge tiles to complete installation.
Seal Seams (Optional)
For added durability, especially in damp areas like basements and bathrooms, seal all seams with silicone caulk designed for vinyl floors.
That’s it! With the right prep and careful application, Floorpops tiles install just as easily as peel-and-stick wallpaper or contact paper. The tiles can be walked on immediately. Wait 24-48 hours before thoroughly cleaning or moving furniture onto the tiles.
Are Floorpops Vinyl Tiles Waterproof?
An important question for many homeowners is whether Floorpops tiles are waterproof. The answer is: mostly waterproof, but not 100% waterproof. The vinyl surface is water-resistant and helps prevent water from penetrating to the adhesive layer. However, gaps between tiles or at seams can allow moisture through over time.
Here are some tips for using Floorpops vinyl tiles in wet areas:
- Avoid direct water contact as much as possible. Quickly wipe up spills and splashes.
- Seal all seams carefully with silicone caulk designed for vinyl floors. This helps prevent moisture penetration.
- Limit use to kitchens, laundries, and bathrooms. Avoid areas with prolonged water exposure like saunas or poolsides.
- Don’t install around floor drains or sump pumps where flooding is a risk.
- For bathrooms, add an additional waterproofing layer like Redgard over the tiles.
So in summary, Floorpops tiles provide water resistance but not guaranteed waterproofing. With proper precautions, they can work well in kitchens, bathrooms, and basements prone to occasional moisture. But they should be limited to light use in wet areas, not continually soaked spaces.
Can Floorpops Vinyl Tiles Be Used in Bathrooms?
Floorpops vinyl tiles can work well in bathrooms with some added precautions. Bathrooms see a lot of splashing and humidity, so it’s important to waterproof the tiles and limit risk of moisture damage. Here are some bathroom vinyl tile tips:
- Seal all seams with bathroom-grade silicone caulk to prevent moisture penetration.
- Install Floorpops tiles wall-to-wall in bathrooms if possible. Gaps at edges raise moisture risks.
- Apply a waterproofing coating like Redgard over the entire Floorpops installation. This adds leak protection.
- Avoid installing Floorpops tiles right next to or around showers and bathtubs. Keep them further from direct water contact.
- Check tiles periodically for any loosening, curling edges, or damage from moisture. Replace individual tiles as needed.
- Consider skipping Floorpops for public/commercial bathrooms or those with frequent heavy use. The constant dampness raises problems.
- For laundry room floors, apply an epoxy sealer coat for added protection from drips and spills.
With proper installation and care, Floorpops vinyl tiles can transform most residential bathrooms. Just take precautions—don’t install them in steam showers or make tile-to-tile gaps that allow leaks through. Limit use to home bathrooms with light to moderate traffic.
How Durable Are Floorpops Vinyl Tiles?
Floorpops vinyl tiles stand up well to normal residential use when properly installed. However, they are less durable than materials like ceramic, stone, or porcelain tile. Here are some considerations on Floorpops tile durability:
- Moderate foot traffic – Floorpops tiles resist everyday footsteps, walking, and furniture use. High heels can dent vinyl surfaces over time.
- Not scratch-proof – Sharp objects can scratch and gouge Floorpops tiles. Don’t drag furniture across them. Apply felt pads under chair and table legs.
- Susceptible to heat damage – Cigarettes, hot pots/pans, and other heat sources can melt or scorch vinyl tiles. Use trivets and mats.
- Prone to buckling – Excess moisture can make Floorpops tiles bubble or curl at edges. Limit use in very damp rooms.
- Can show indentations – Heavy objects like appliances can compress and dent Floorpops over time. Use care when moving objects.
- Holds up to cleaning – Floorpops resist typical cleaning solutions. Avoid harsh chemicals.
For best durability, inspect Floorpops tiles regularly and replace damaged ones as needed. Overall, they provide a versatile and affordable floor covering that lasts with proper care and maintenance. They aren’t indestructible, but handle normal wear better than many removable options.
How Do I Clean Floorpops Vinyl Tiles?
One of the benefits of Floorpops vinyl tiles is that they are easy to keep clean. Here are some tips for cleaning Floorpops tiles:
- Sweep or vacuum regularly to remove dirt and debris that canscratch tile surfaces.
- Wipe up spills promptly with a damp mop or cloth to prevent staining. Avoid excessive water.
- For regular cleaning, use a mild vinyl floor cleaner or soap and water. Too much moisture can loosen tiles.
- Spot clean tough dirt or stains with isopropyl alcohol or nail polish removerapplied sparingly to a small area.
- Avoid harsh chemicals like ammonia, bleach, or acidic cleaners. Always check cleaner labels for compatibility with vinyl floors.
- For a deeper clean, use a scrubbing pad or brush with mild soap and water. Scrub entire floor on hands and knees.
- Reseal seams with caulk periodically if needed to prevent moisture entry and curling edges.
- Replace damaged tiles as needed. Single tiles can be peeled up without removingwhole sections.
With the right gentle cleaners and regular maintenance, Floorpops vinyl tiles should retain their appearance for many years. Avoid flooding the tiles and use care with moving heavy objects to prevent damaging them.
Can I Install Floorpops Vinyl Tiles over Existing Flooring?
One of the benefits of Floorpops peel-and-stick tiles is that in many cases they can be installed directly over existing flooring. Here are some guidelines:
- Floorpops adhere best over smooth surfaces like existing vinyl, linoleum, sealed concrete, ceramic or porcelain tile.
- Remove carpet and use floor leveling compound to smooth uneven areas before installing Floorpops tiles.
- Heavily textured surfaces like quarry tile, bumpy concrete, or grouted floors often need smoothing for Floorpops tiles to stick properly.
- Existing floors must be clean, dry, and well-sealed. Remove grease, wax residues, and any loose materials.
- Do not install Floorpops over unsound flooring or surfaces prone to crumbling or cracking.
- Hardwood floors require sealing any cracks between boards to prevent moisture gettingunderneath, which can cause loosening or curling edges.
- Limit use of Floorpops over radiant heat flooring systems. The heat can soften tiles over time.
Always refer to Floorpops instructions for recommended surfaces. With proper prep and application, the peel-and-stick tiles provide an easy upgrade over many different existing floors. Just ensure the subsurface is suitable.
Are Floorpops Vinyl Tiles Easy to Remove?
One major advantage of Floorpops over traditional tile is that they are designed to be removable and reusable. The vinyl tiles peel up without damaging most underlying floors. Here are some tips for easy removal:
- Use a utility knife to cut around all edges of the section to be removed. This breaks the bottom adhesive seal.
- Slowly peel up a corner, working the tile back from the floor gently. Peel up rather than pulling straight up to avoid adhesive residue.
- Go slow on edges if they resist removal. Reapply the knife to release more adhesive as needed.
- For tiles stuck firmly in the middle, slide a stiff putty knife under the tile edgedto lift and peel away from the center out.
- Apply rubbing alcohol or heat from a hair dryer to stubborn spots to loosen adhesive grip.
- Expect more effort removing Floorpops tiles installed for longer time periods or in warmer locations. The adhesive cures harder over time.
- Be prepared to use patching or floor leveler on concrete floors where adhesive pulled up paint or surface material when removing tiles.
With care, Floorpops tiles can be reused, but unlikely more than a few times before adhesive effectiveness wears out. Proper technique prevents damage to the subsurface when removing them.
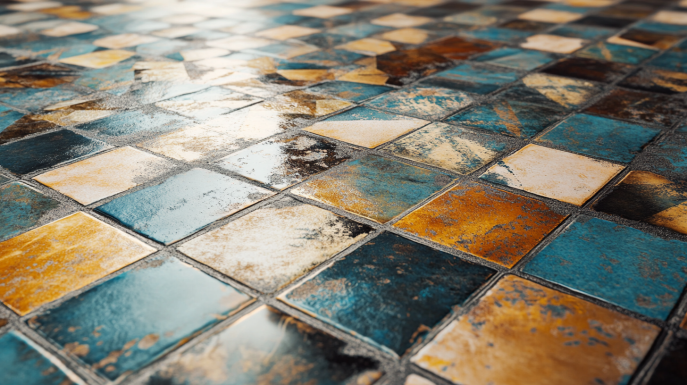
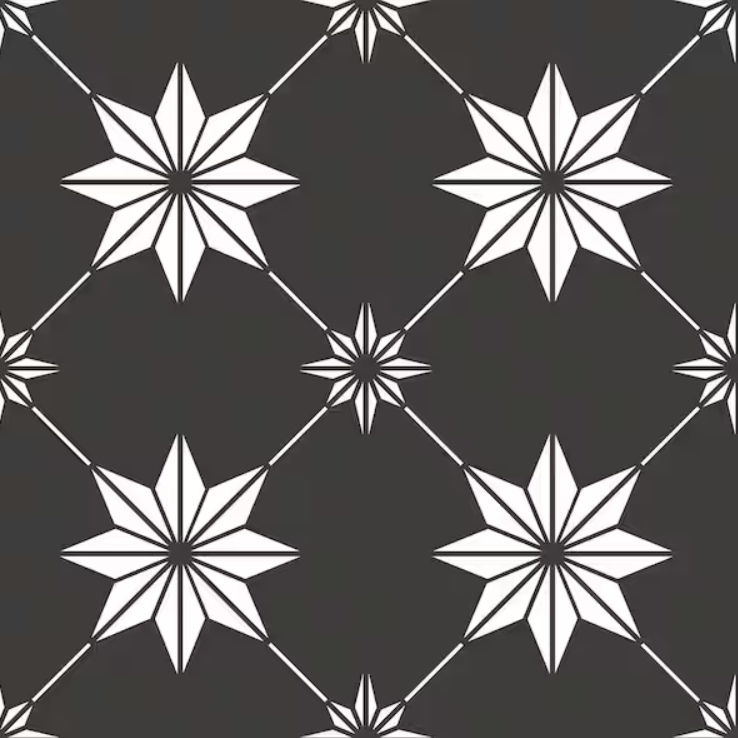
What Designs Do Floorpops Vinyl Tiles Come In?
One great advantage of Floorpops over traditional flooring is the huge range of available designs. From elegant to funky, they offer tons of customizable options:
Wood looks – Warm, natural wood-grain patterns like oak, pine, cedar, and bamboo in various stain colors.
Stone styles – Realistic marble, travertine, slate, granite, and other stone looks.
Concrete – Realistic poured concrete patterns and textures.
Herringbone – Sophisticated herringbone and chevron Vinyl patterns.
Geometric – Bold geometric shapes, zig-zags, diagonal grids, and moroccan-inspired motifs.
Solid colors – Glossy or matte solid color tiles in virtually any hue.
Patterns – Tropical, southwestern, oriental, floral, and other lively prints and borderpatterns.
Metallic – Tiles with silver, gold, copper, bronze and other shimmery metallic looks.
Eclectic – Quirky, fun designs like animal prints, polka dots, and mosaic styles.
The full range at Floorpops provides limitless design options for customizing your space. Mix and match colors, textures, and patterns for a completely unique floor.
How Much Do Floorpops Vinyl Tiles Cost?
Floorpops vinyl tiles are very competitively priced compared to other flooring options. Here are some average Floorpops price ranges:
- Budget tiles: Solid color and minimal pattern tiles $1-$2 per square foot
- Standard styles: Most wood, stone, and geometric looks $2-$4 per square foot
- Premium designs: Metallic finishes, complex patterns $4-$5+ per square foot
- Small area kits: Start around $10 for enough tile to cover 1-3 square feet
- Accessories add cost, like additional adhesive and seam sealer
Consider entire project costs beyond just tile price:
- Adhesives/caulking
- Tools (utility knife, straight edge, etc.)
- Floor prep materials
- Removal labor if replacing previous floor
For the dramatic transformation they provide, Floorpops tiles deliver great value compared to materials like stone, ceramic, or hardwood. The peel-and-stick application provides major cost savings on installation labor too.
Where Can I Buy Floorpops Vinyl Tiles?
The best place to view the full Floorpops product line and order tiles is their website FloorPops.com. They offer all standard and premium vinyl tile designs, plus handy measuring and layout tools.
Floorpops vinyl tiles are also available from various online retailers:
- Home Depot
- Walmart
- Wayfair
- Overstock.com
- Amazon
Availability of specific tile designs and prices can vary between retailers. Browsing the Floorpops site gives the most options. For in-person shopping, check home improvement stores like Home Depot for a limited selection of patterns.
Be sure to order a few extra tiles or save leftovers for future repairs. Floorpops sells individual tiles if you need replacements down the road. Consider group discounts for large projects.
Do I Need Special Tools to Install Floorpops Vinyl Tiles?
Installing Floorpops vinyl tiles is designed to be a DIY-friendly project. It does not require special tools beyond what most homeowners already have:
Measuring: Tape measure, yardstick, laser measuring tool (for larger rooms)
Cutting: Utility knife with sharp blades, straight edge or ruler
Application: Smoothing roller, compression roller (optional but recommended)
Prep: Rubbing alcohol, rags
You may also need patching/floor leveling compound and an etching solution for concrete floors. Have materials ready to smooth or fill any dents, cracks, grout lines, or uneven areas in the subsurface.
A couple specialty vinyl flooring tools can make installation easier but are not essential:
- Vinyl cutter – Cuts perfect straight lines faster than utility knife
- J-roller – Gets into tight edges and under toe kicks easier
With some basic DIY tools and prep materials, Floorpops tiles can be transformed from a box of tiles into a beautiful new floor.
How Do Floorpops Vinyl Tiles Compare to Traditional Tiles?
Floorpops provide an excellent peel-and-stick alternative to classic ceramic, porcelain, or stone tile. Here’s how they compare:
Cost – Floorpops tiles are significantly cheaper, often $1-3 less per square foot. No specialized labor needed.
Installation – Self-adhesive application vs. mortar, spacers, grout for traditional tile.
Thickness – 2-3mm for Floorpops vs. at least 6mm for ceramic or stone.
Durability – Natural stone and ceramic stronger and more scratch-resistant than vinyl.
Water resistance – Porcelain superior, but Floorpops work well with proper sealing.
Removability – Floorpops are reusable. Traditional tiles permanently adhere.
Variation – More color/pattern options with Floorpops. Traditional materials limited.
Use – Floorpops for residential; stone/ceramic better for commercial.
While not as hardy as real stone or ceramic, Floorpops provide an easy, affordable, removable alternative for temporary upgrades and remodeling projects.
Can Floorpops Vinyl Tiles Be Used on Walls?
While Floorpops vinyl tiles are made for flooring, they can also be applied to walls in certain scenarios. Keep these tips in mind:
- Ensure the wall surface is smooth. Small bumps or uneven plaster can prevent good adhesion.
- Thoroughly clean and dry the wall before installation. Excess moisture under Floorpops tiles leads to failure or curling.
- For bathrooms, seal all seams carefully with bathroom-grade caulk. Limit wall installation to dry areas away from direct water contact.
- Press tiles firmly during application and roll with pressure across the entire surface to activate adhesive.
- Outside corners and edges may peel over time without an adjacent tile helping hold them down. Consider finishing edges with trim.
- Expect to replace sections more frequently than floor installations. Wall tiles are more prone to loosening along top edges over time.
While wall use is possible, Floorpops tiles work best on floors. Limit wall installations to dry, low-traffic areas. Take steps to promote solid adhesion, and expect to have to replace sections periodically as edges release.
Are Floorpops Vinyl Tiles Safe for Kids and Pets?
Floorpops vinyl tiles gain high marks for safety:
- Non-toxic – Floorpops tiles contain no hazardous chemicals or materials. VOC emissions are well below health risk thresholds.
- Hypoallergenic – Vinyl tiles don’t harbor dust mites, mold, or allergens like carpets can. Great for allergy sufferers.
- No loose fibers or splinters – Solid vinyl construction is safer for crawling babies than materials like carpets or hardwood.
- Easy to clean – Vinyl wipes clean easily to remove germs, drool, and accidents. No absorption like carpet.
- Slip resistant – Floorpops tiles are textured rather than glossy smooth, providing traction for pets and kids.
- Doesn’t retain heat – Bare feet won’t get burned on hot sunny days like darker tiles can.
- Soft, warm feel – More comfortable for kids playing and pets napping than cold porcelain or stone tiles.
Always supervise young children and pets closely around any flooring. But Floorpops provide a safer surface than many alternatives. Their durability, cleanability, and coziness make them a great choice for families.
How Do I Cut Floorpops Vinyl Tiles to Fit?
One advantage of Floorpops vinyl tiles is the ability to easily trim and cut them to fit the space. Here are some tips:
- Use a sharp utility knife and steady straight edge as a guide to cut tiles. Change blade frequently for clean cuts.
- For straight cuts on multiple tiles, use a vinyl floor tile cutter for fast, consistent results.
- Make small precise cuts by tracing the shape on the tile then carefully cutting just inside the lines.
- Cut tiles upside down for greater control and accuracy.
- Start cuts slowly with light pressure, scoring the top vinyl layer several times before pressing deeper through the tile. This prevents jagged edges.
- For irregular shaped cuts, make a cardboard template as a guide first. Trace template outline onto tile before cutting.
- Cut tiles so edges fall at natural grout lines or patterns in the design. Unnatural cuts look obvious.
- Keep a sample tile on hand to test cut procedures before working on actual floor tiles.
With careful measurement, sharp tools, and patience, Floorpops tiles can be trimmed and shaped to fit virtually any floor space creatively.
How Long Do Floorpops Vinyl Tiles Last?
With proper installation and care, Floorpops vinyl tiles typically last:
- 3-4 years is about average for Floorpops tiles in terms of retaining a pristine appearance in moderate traffic areas.
- With careful maintenance and prompt replacement of damaged tiles, Floorpops can last closer to 5-7 years before requiring full replacement.
- Tiles in light use areas like bedrooms often last over 5 years. Heavier wear in entryways or kitchens shortens lifespan to the 3 year range.
- Using Floorpops in bathrooms or areas prone to spills further limits lifespan, sometimes to less than 2 years.
Factors impacting longevity:
- Surface wear from foot traffic, furniture, dirt, and exposure to heat or moisture.
- Quality of installation directly impacts durability. Proper floor prep and sealing is key.
- Regular cleaning and maintenance extends appearance and performance.
While not as long-lasting as materials like hardwood or natural stone, Floorpops provide an affordable way to refresh floors with minimal commitment. Since tiles can be replaced individually, Floorpops last as long as you want with proper care.
Can Floorpops Vinyl Tiles Handle Heavy Furniture?
While durable for everyday use, Floorpops vinyl tiles have limitations in terms of heavy objects. Here are some guidelines on using Floorpops with heavy furniture:
- Limit extremely heavy appliances and fixtures on Floorpops tiles. Refrigerators, stoves, slate pool tables, etc. may cause indentations over time.
- Wide casters or rollers distribute weight more evenly. Use these instead of small narrow wheels under furniture legs.
- Periodically move furniture around to allow compressed areas of Floorpops tiles to recover and minimize indentation damage.
- Place furniture glides under legs for items that will stay in one place. These disperse weight rather than concentrating it on small points.
- Add an extra layer of thin plywood under heavy objects for better weight distribution and to limit indentation depth into tiles.
- Expect some minor impressions over time in high traffic zones – this is normal. Just monitor for excessive visible damage.
With reasonable precautions, Floorpops hold up fine to typical residential furniture use. Allowing tiles to recover between furniture placements further extends their appearance and performance in high traffic areas.
Are There Alternatives to Floorpops Vinyl Tiles?
Floorpops provide a popular and affordable self-adhesive tile option, but are not the only product of their kind. Here are some other brands to look at:
NuCore vinyl tiles – Similar paper-backed peel-and-stick tiles sold at Home Depot. Comparable quality and cost to Floorpops.
TrafficMASTER – Sold at Lowe’s, TrafficMASTER has a vinyl tile line with many modern styles. Slightly thicker than Floorpops.
StikTiles – Direct Floorpops competitor with very similar paper-backed vinyl tiles in a variety of patterns.
Smart Tiles – Removable and reusable foam-based tiles instead of vinyl. Interlocking edges instead of adhesive.
FLOR carpet tiles – Adhesive carpet squares allow creating custom area rug looks. More cushioning than solid vinyl.
Vinyl plank flooring – Tongue-and-groove float-in planks for permanent installation. More durable than peel-and-stick.
There are pros and cons to each product. Evaluate based on your specific needs and project scope. Overall, Floorpops strike an excellent balance of quality, cost, variety, and ease of installation.
What Should I Do if a Floorpops Vinyl Tile Doesn’t Stick Properly?
Floorpops tiles bond best on clean, smooth surfaces. But improper prep or technique can result in tiles that won’t stick flat or start to release prematurely after installation. Here are some tips if tiles won’t adhere properly:
- Carefully cut around the tile perimeter to detach rather than pulling up. This avoids damaging the subsurface.
- Roughen the back of the tile slightly with sandpaper. Wipe with rubbing alcohol before reapplying.
- Ensure the floor under the tile is perfectly smooth, clean, and dry. Fix any adhesive residues, dust, or debris inhibiting contact.
- Apply pressure with a roller across the entire tile and surrounding area during installation. Full contact adhesion is crucial.
- If tiles release shortly after application, moisture was likely the culprit. Allow the floor to fully dry out before reapplying in that area.
- For edges that release and curl over time, apply new caulking or Floorpops seam sealer to better seal the perimeter.
With proper prep and install methods, Floorpops tiles adhere smoothly. But lifting and relaying individual problem tiles is easy. Just take care not to damage the floor underneath when removing them.
Conclusion
Floorpops peel-and-stick vinyl tiles provide a versatile, affordable way to transform floors in any room. Their removable and reusable design allows experimenting with different looks temporarily or long-term. While not indestructible, Floorpops offer durability for daily life when properly installed and maintained.
With the right prep to create a smooth floor, accuracy in measuring and cutting, and care during application, even DIYers can install Floorpops successfully. Take precautions like sealing seams in wet areas and avoiding excess moisture to prevent loosening.
The range of colors, textures, and patterns available from Floorpops allows limitless customization. For a budget-friendly floor makeover without the permanence or cost of traditional tile, Floorpops vinyl tiles are an option worth considering.