
Create a Stylish and Durable Floor With Floorpops Foam Floor Tiles
If you’re looking to give any room in your home a quick and easy makeover, Floorpops peel-and-stick foam floor tiles are a great option to consider. These innovative floor tiles allow you to transform dull, boring floors into fun and stylish spaces with minimal time and effort.
In this comprehensive buying guide, we’ll tell you everything you need to know about Floorpops foam tiles so you can decide if they are the right choice for your next flooring project. We’ll cover topics like installation, durability, designs, cost, comparisons to other flooring, and much more. Let’s dive in!
What Are Floorpops Foam Tiles?
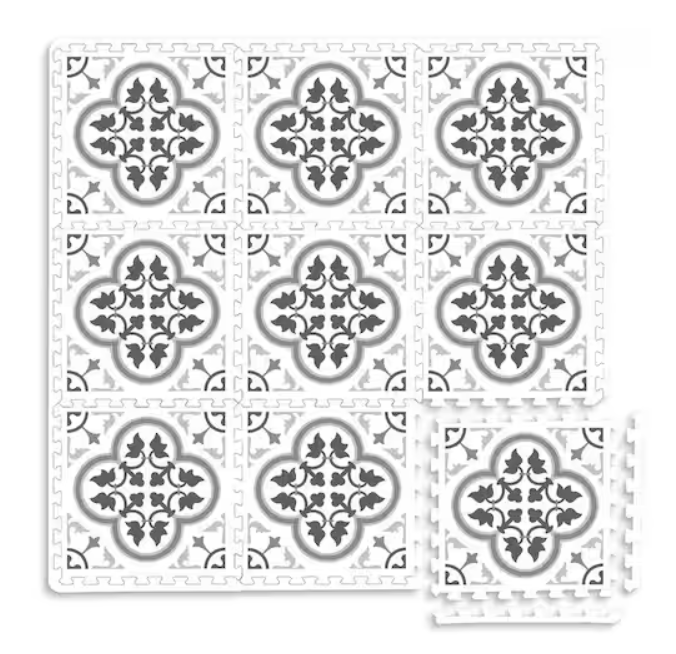
Floorpops foam tiles are interlocking floor tiles made from thick, dense foam material. They have a sticky backing so they adhere securely to existing floors, whether that’s concrete, wood, vinyl, or even carpet. The top surface has a pattern printed on it to mimic materials like wood, stone, marble, brick, and more.
Floorpops offers both 12″ x 12″ square tiles and 12″ x 24″ rectangular plank tiles. The tiles are 5mm thick and made from lightweight EVA foam. They are designed to be easy for anyone to install, even without experience.
The foam construction makes Floorpops tiles softer and more comfortable to walk and stand on than hard surface flooring alternatives. The foam is durable enough for high traffic areas yet forgiving enough for playrooms.
Floorpops tiles allow you to customize the look of any space without difficult installation or permanent commitment. The peel-and-stick application means you can easily remove them or rearrange them whenever you want.
How to Install Floorpops Foam Tiles
Installing Floorpops foam tiles is a quick and easy DIY project. Here are some tips for seamless installation:
- Make sure the floor surface is clean and dry before starting. Remove any debris, dust, grease, etc so the adhesive sticks properly.
- Lay out the tile pattern beforehand to visualize the layout. Mix and match tiles for a unique look.
- Start in a corner and peel off the backing from the first tile. Firmly press the sticky side to the floor for a tight bond.
- Connect tiles side-by-side, lining up the edges neatly. Gently press down on each new tile to adhere it. Work row by row.
- Cut any edge tiles to fit around fixed objects, walls, and borders using household scissors. Floorpops tiles cut easily.
- Roll over the tiles with a rolling pin when finished to smooth any raised edges between tiles.
- Avoid heavy foot traffic for 24 hours after installing to allow the adhesive to fully cure.
With this simple process, anyone can transform a room in just a few hours. No special skills, tools, or materials needed!
Are Floorpops Tiles Waterproof?
An important question for kitchens, bathrooms, laundry rooms, and any space prone to spills or moisture. Floorpops foam tiles are water-resistant, but not 100% waterproof. The foam material is dense enough that minor spills can be easily wiped up without damage. However, these tiles should not be subjected to standing water or soaked thoroughly.
For truly waterproof flooring, products made from vinyl, rubber, porcelain, or natural stone are better options. But Floorpops tiles resist light moisture well for most home use cases. Just avoid flooding the floor for prolonged periods.
Perfect for Playrooms
Thanks to their soft, padded foam material, Floorpops tiles are ideal for kids’ playrooms and activity spaces. The tiles provide a comfortable surface for playing and rolling around without injury risk from hard floors. They also absorb noise and impact, keeping sounds muted.
Playroom floors take a lot of abuse from high activity and toy litter. Floorpops tiles stand up well to rowdy kids and make cleanup easy. Their bright colors and fun patterns help create an energetic playspace kids will love. Stylish flooring that parents can actually enjoy too!
How Durable Are Floorpops Tiles?
Durability is always a concern with flooring in high-traffic areas. Overall, Floorpops foam tiles are quite durable and withstand normal wear well. The dense EVA foam holds up to regular foot traffic without flattening or deforming over time. And the peel-and-stick adhesive keeps tiles firmly in place, even with heavy use.
However, Floorpops tiles are not as indestructible as stone, ceramic, or solid vinyl floors. The soft foam can be punctured by sharp objects or permanent indentations left from heavy furniture. Foam tiles won’t stand up to pet claws either. But for most everyday demands, Floorpops offer reliable performance and longevity.
Proper care also boosts their lifespan. Be sure to clean tiles regularly and promptly wipe up spills. Avoid rolling heavy appliances or furniture over them too. With reasonable precautions, Floorpops tiles maintain their look and function for years.
Cleaning and Care Tips
Caring for Floorpops tiles is quick and easy thanks to the durable, wipeable foam material. Here are some tips for keeping them looking fresh:
- Sweep or vacuum regularly to remove dirt, debris, and crumbs that can get ground into the tile surface.
- Spot clean spills and stains immediately with mild soap and water. Don’t let moisture soak in.
- Use a damp mop to wash the entire floor periodically. Harsh cleansers can damage the foam.
- Don’t use traditional floor cleaning products like waxes, sealants, or polishes on the tiles. They don’t require this maintenance.
- Avoid dragging sharp objects across the floor that could scratch or puncture the tiles.
- Rearrange tiles occasionally to distribute wear evenly if you notice fading in high-traffic paths.
With proper care, Floorpops tiles will retain their color and appearance for many years. Their low-maintenance cleaning needs are a big benefit too.
Can Floorpops Tiles Be Installed Over Carpet?
This is one of the most common questions about Floorpops tiles. Fortunately, the answer is yes – you can install these tiles directly over most types of existing carpet for an easy upgrade. The adhesive backing adheres securely to carpets without needing to remove them.
Installing over carpet has multiple advantages:
- Provides cushioning for a more comfortable floor
- Makes installation even faster without carpet removal
- Allows you to redo the carpet later if desired
- Adds sound dampening qualities
Just make sure carpet is flat with no raised edges and vacuum thoroughly before installing tiles. Foam tiles conform nicely to the carpet texture. This is an ideal flooring refresh if you’re not ready for a full carpet overhaul.
Are Floorpops Tiles Easy to Remove?
A major benefit of Floorpops foam tiles is that they can be easily removed when needed without damaging the underlying floor. The adhesive peels up without leaving a sticky residue or requiring chemical removers.
Reasons you may want to remove Floorpops tiles include:
- Replacing worn or damaged tiles
- Changing up the pattern or color scheme
- Moving them to a new room
- Prepping the floor for new permanent flooring
To remove, simply lift up a corner and slowly peel the tile off the floor. Go slowly to avoid tearing the foam. Any adhesive left behind wipes right up. This makes Floorpops tiles a great temporary flooring option.
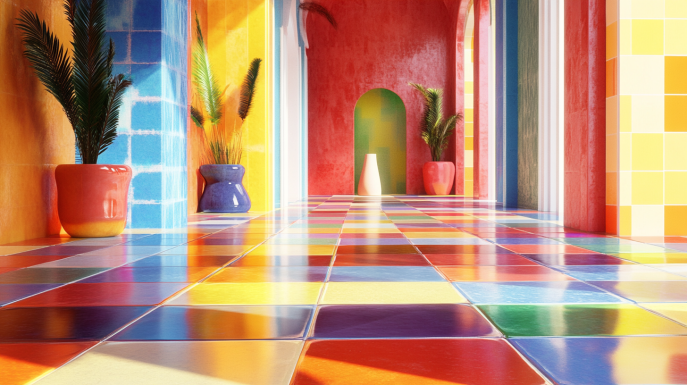
Fun Design and Color Options
One of the most appealing perks of Floorpops tiles is the wide range of fun and stylish designs available to suit any room’s decor. Choices include:
- Wood looks – Various realistic hardwood, weathered barnwood, parquet, and other wood effects
- Stone and ceramic visuals – Tile, marble, travertine, slate, and terrazzo styles
- Patterns – Herringbone, chevron, basketweave, and mosaic motifs
- Solid colors – Shades like black, gray, blue, purple, pink, green, and more
- Brick and concrete effects – Rustic and industrial styles
With so many options, it’s easy to find the perfect print and color palette for your space. Mix and match for a one-of-a-kind floor!
Floorpops Foam Tiles vs. Other Flooring
How do peel-and-stick foam tiles compare to other types of flooring? Here’s a quick rundown:
- More affordable than wood, stone, porcelain: Great budget-friendly alternative
- Softer and warmer than vinyl, laminate: More comfortable underfoot
- Easier installation than all: No professionally contracted installers needed
- Not fully waterproof like vinyl: Resists moisture but has limits
- Less durable than ceramic, concrete: Not indestructible but still robust
- More DIY-friendly than carpeting: Much easier for amateurs to install
Overall, Floorpops provide a nice middle ground – more stylish and durable than basic carpet, but without the cost or labor intensity of permanent flooring. Convenient and customizable!
What’s the Cost of Floorpops Tiles?
Floorpops tiles range from $7-$13 per square foot on average. This affordable pricing is one of their biggest advantages. For comparison:
- Solid hardwood floors cost $3-$8 per square foot just for materials, not including labor.
- Tile costs $3-$15 per square foot for installation alone, plus pricey material fees.
- Sheet vinyl is $2-$5 per square foot.
- Laminate flooring is $1.50-$5 per square foot.
So Floorpops provide dramatic visual impact and high-end style at a fraction of the cost of updating floors permanently. With DIY installation, they become a very budget-friendly flooring renovation.
Where to Buy Floorpops Online
The best place to buy Floorpops foam tiles is from the official Floorpops website. They offer all standard tile sizes and the full spectrum of design and color options. Perks include:
- Detailed product information
- Ordering individual tiles or in bulk
- Sales and special coupon codes
- Style recommendations for each room
- Customer reviews and photos
- Free shipping in the contiguous US
Floorpops tiles are also available on online retailers like Wayfair, Overstock, Home Depot, and Lowes. But the official Floorpops site provides the biggest selection and best prices.
Installation Tools Needed?
One of the biggest perks of Floorpops tiles is that no special tools are required for installation – they are totally DIY and beginner friendly. All you need is:
- Tape measure
- Pencil/marker
- Utility knife or sturdy scissors
- Roller (or rolling pin) to adhere tiles
Basic household items like these allow even novice DIYers to transform their floors. No rented flooring tools, saws, or adhesives needed. Floorpops are designed to be easily installed by anyone.
How Floorpops Compare to Luxury Vinyl Tile (LVT)
Luxury vinyl tile (LVT) is another popular DIY flooring option, so how do peel-and-stick tiles compare?
Main benefits of Floorpops over LVT:
- More affordable material cost
- Softer and warmer underfoot
- Install directly over existing floors
- Easy peel-and-stick application
Advantages of LVT over Floorpops:
- Wider plank sizes for a wood look
- Truly waterproof surface
- More scratch and dent resistant
- Can be grouted for a seamless look
Floorpops provide quicker, cheaper installation and cozier comfort. But LVT is more indestructible and realistic looking. Choose the option better suited to your space!
Using Floorpops Tiles Outdoors
While designed for indoor use, Floorpops tiles can work in some protected outdoor areas. Use in:
- Covered patios, porches, and gazebos
- Pool decks and surrounds
- RVs, campers, and trailers
- Entryways and breezeways
Avoid direct sun and standing water. Don’t install outdoors when temperatures are below 50°F.
Floorpops won’t stand up to harsh outdoor elements like solid exterior tiles. But they add style to transitional outdoor spaces in mild climates.
Are Floorpops Safe for Kids and Pets?
Parents and pet owners can rest easy – Floorpops foam tiles are completely safe for kids and pets. The EVA foam material is non-toxic and phthalate-free. It won’t emit any harmful fumes either.
The foam is naturally antimicrobial too. So it discourages mold or bacteria growth that could trigger allergies or illness.
Floorpops tiles also provide a softer surface for crawling babies or unsteady toddlers just learning to walk. And pets won’t slip on the textured material. With fun patterns kids and pets will enjoy, Floorpops offer worry-free, family-friendly flooring.
Cutting Tiles to Fit Your Space
Cutting Floorpops tiles is part of the installation process since most projects involve some partial tiles around the borders or objects. Trimming them to size is easy:
- Use a metal ruler and pencil to mark cut lines.
- Keep the tile face down when cutting to avoid surface damage.
- Kitchen or carpet shears work well, but a utility knife can also be used.
- Cut slowly and steadily straight across the marked line through the foam.
- Fit into place and press firmly to adhere the cut edges.
It’s normal to have small gaps between cut tile edges and walls. Install quarter-round trim if you want a perfect flushed edge.
How Long Do Floorpops Tiles Last?
With proper installation and care, Floorpops tiles typically last 3-5 years before needing replacement. High foot traffic areas may require new tiles more frequently, around the 2-3 year mark.
Factors that shorten Floorpops’ lifespan:
- Heavy furniture sitting in the same spots
- Pet claws scratching the foam
- Moisture damage from spills or leaks
- Sharp objects gouging the tiles
- Poor initial adhesion to the floor
Consider Floorpops a middle-term flooring solution, not a lifelong permanent one. Their convenience and affordability balance out replacing them every few years.
Using Floorpops Under Heavy Furniture
Dense furniture and appliances put added weight on flooring that can crush foam tiles. So how do Floorpops hold up?
For light furniture, Floorpops present no issue at all. But heavy items like pianos or file cabinets could dent the foam over time when in fixed spots. Solutions include:
- Add felt pads under furniture legs to disperse weight
- Periodically rotate or slide furniture a few inches in each direction
- Select solid flooring like LVT instead for equipment-filled spaces
As long as pressure is distributed evenly and focused points avoided, Floorpops offer enough support for most furnishings. Just take precautions with excessively heavy items.
Flooring Alternatives to Floorpops
If peel-and-stick foam tiles don’t seem like the right solution for your space, here are a few other options to consider:
- Luxury vinyl tile (LVT) – Waterproof vinyl with realistic wood/stone looks
- Porcelain or ceramic tile – Durable and stylish but requires pro install
- Laminate flooring – Affordable hardwood mimic but noisy and not moisture friendly
- Sheet vinyl – Seamless and budget option but limited on looks
- Carpet tiles – Soft tiles perfect for bedrooms but not water friendly
- Engineered hardwood – Real wood resistant to moisture damage but expensive
Each flooring type has pros and cons. Assess your budget, installation abilities, and needs to pick the best fit. Floorpops provide a solid middle ground.
Solutions for Improper Tile Adhesion
With peel-and-stick application, Floorpops tiles not adhering properly is an occasional issue. Causes include:
- Not thoroughly cleaning the floor surface before applying
- Trying to install tiles in temperatures below 50°F
- Pressing tiles down unevenly so adhesive doesn’t contact floor
You can reapply problem tiles. To maximize adhesion:
- Lift tile and scrape off all old adhesive from floor and tile backing.
- Make sure the floor area is clean and dry.
- Press tile down firmly with even pressure across the whole surface.
- Roll over the tile with heavyweight roller to fully secure adhesive.
This will create the tight seal needed for tiles to stay in place. Contact Floorpops customer support for stubborn cases.
The Complete Package
As you can see, Floorpops foam tiles provide a versatile flooring option that combines convenience, comfort, and style. Their peel-and-stick application and diverse designs make home upgrades easy and affordable. Floorpops tiles work in practically any room.
With this comprehensive buying guide, you now have all the details on costs, installation, durability, and more to decide if they are right for your next project. Their many advantages make Floorpops a top choice for DIY renovations. Create a floor that complements your decor and lifestyle with the simple stick-on solution of Floorpops.